
The next step is to load the NVMesh objects to the cluster using the following YAML.
TCP Version
apiVersion: nvmesh.excelero.com/v1
kind: NVMesh
metadata:
  name: cluster1
spec:
  core:
    version: 2.2.0-490
    tcpOnly: true
    configuredNICs: eth0
    azureOptimized: true
  csi:
    controllerReplicas: 1
    version: v1.1.4-7
  management:
    imageRegistry: registry.excelero.com
    mongoDB:
      replicas: 1
    replicas: 1
    version: 2.2.0
Infiniband Version
apiVersion: nvmesh.excelero.com/v1
kind: NVMesh
metadata:
name: cluster1
spec:
core:
version: 2.2.0-423-ib2
tcpOnly: false
configuredNICs: ib0
azureOptimized: true
csi:
controllerReplicas: 1
version: v1.1.4-7
management:
imageRegistry: registry.excelero.com
mongoDB:
replicas: 1
replicas: 1
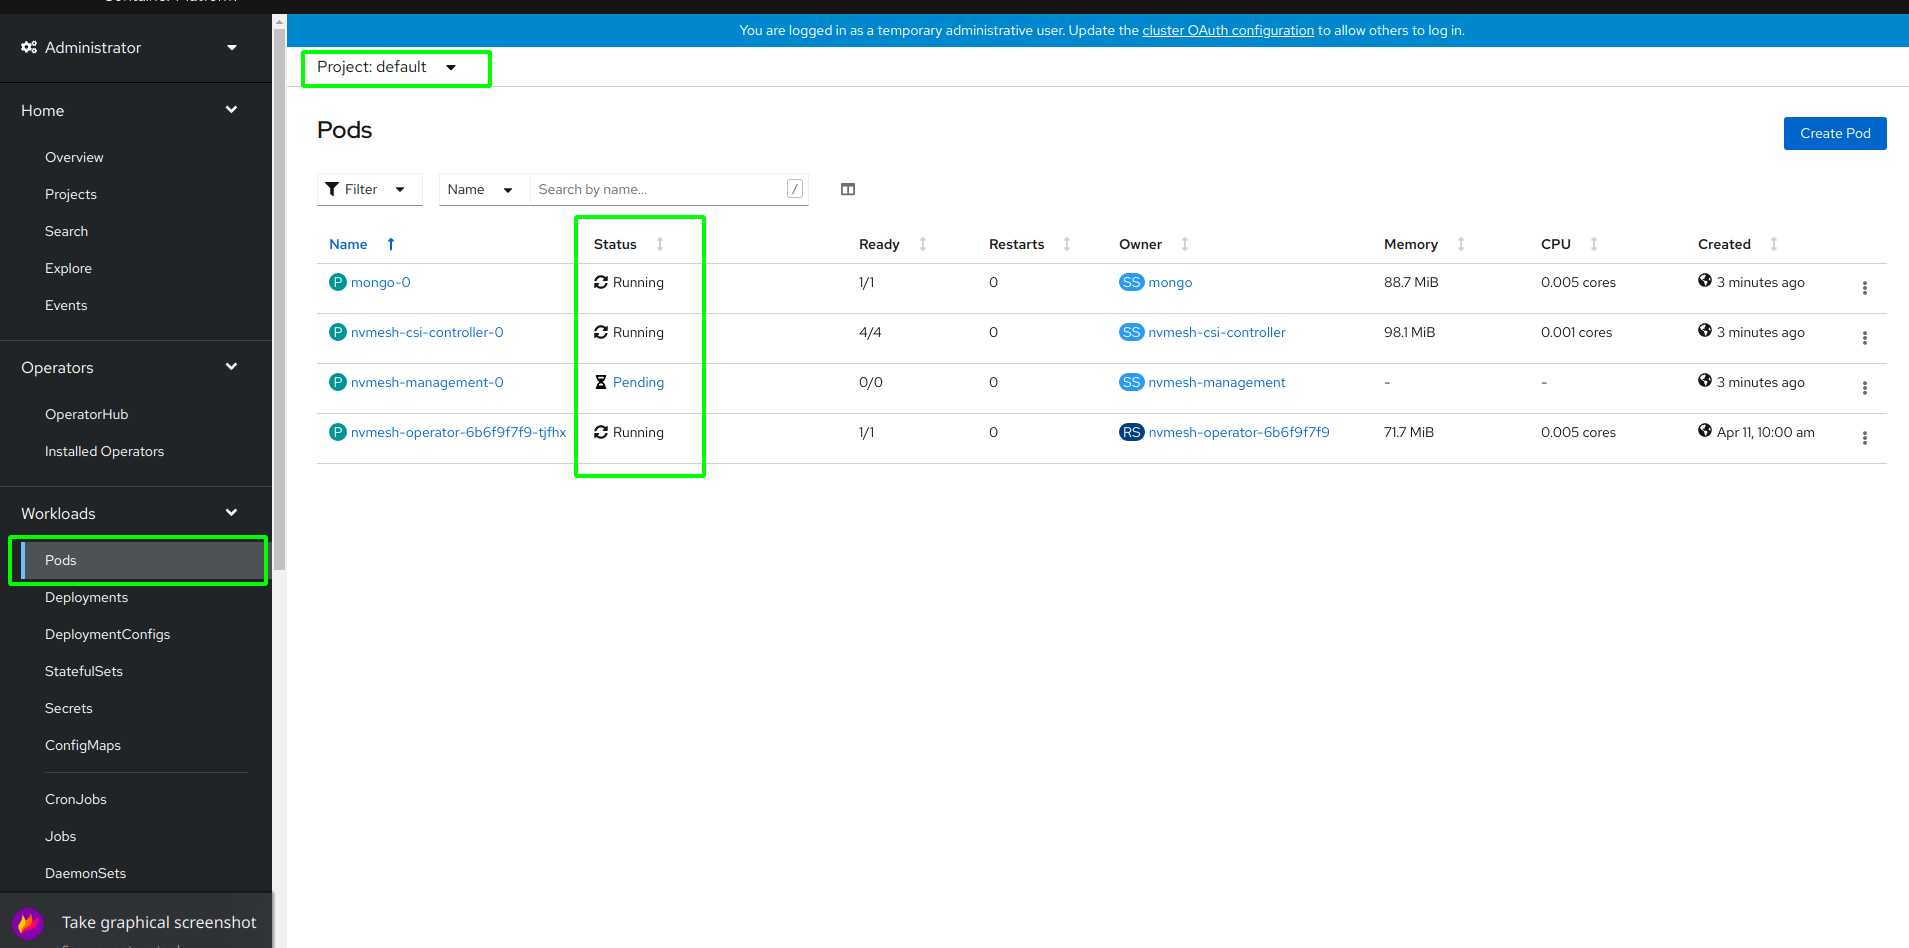
version: 2.2.0To validate, go to the Workloads / Pods page using the left menu. Check that the following pods are running or pending like in the following image.
To start Client, Target, and Management pods, label the OpenShift workers accordingly using the OpenShift CLI, as follows:
- Create an OC token: click kube:admin and then Copy login command
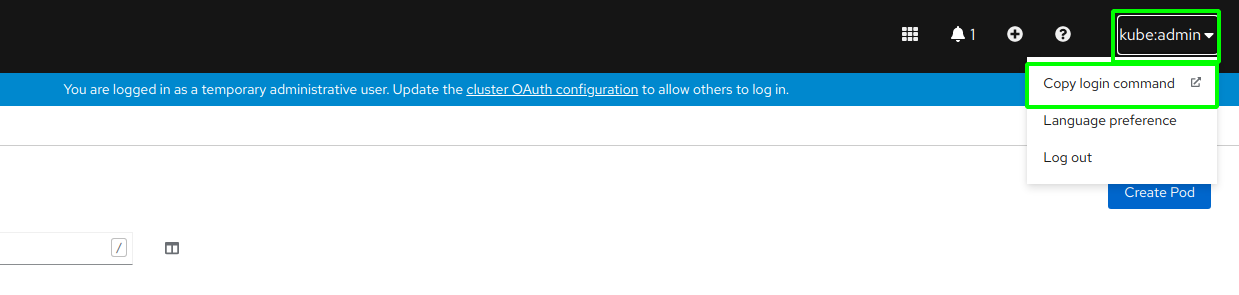
- You may need to re-login with your cluster login/password, for instance if it timed out
- Click Display Token and copy the login command
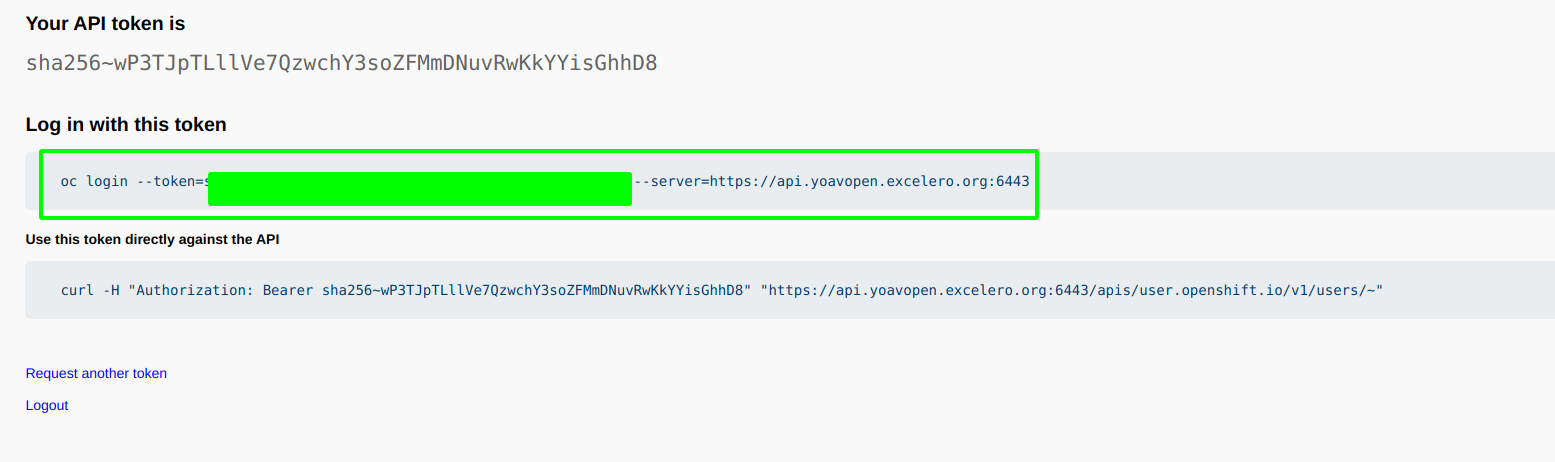
- On the local machine, run the login command
- Run
oc project default - Run
oc get nodes - There should now be 3 workers and 3 masters
- Tag one of the workers as Management by running:
oc label node <worker_name> nvmesh.excelero.com/nvmesh-management="". Change to the name from the previous stage). - Now tag all workers as Client and Target using tags commands:
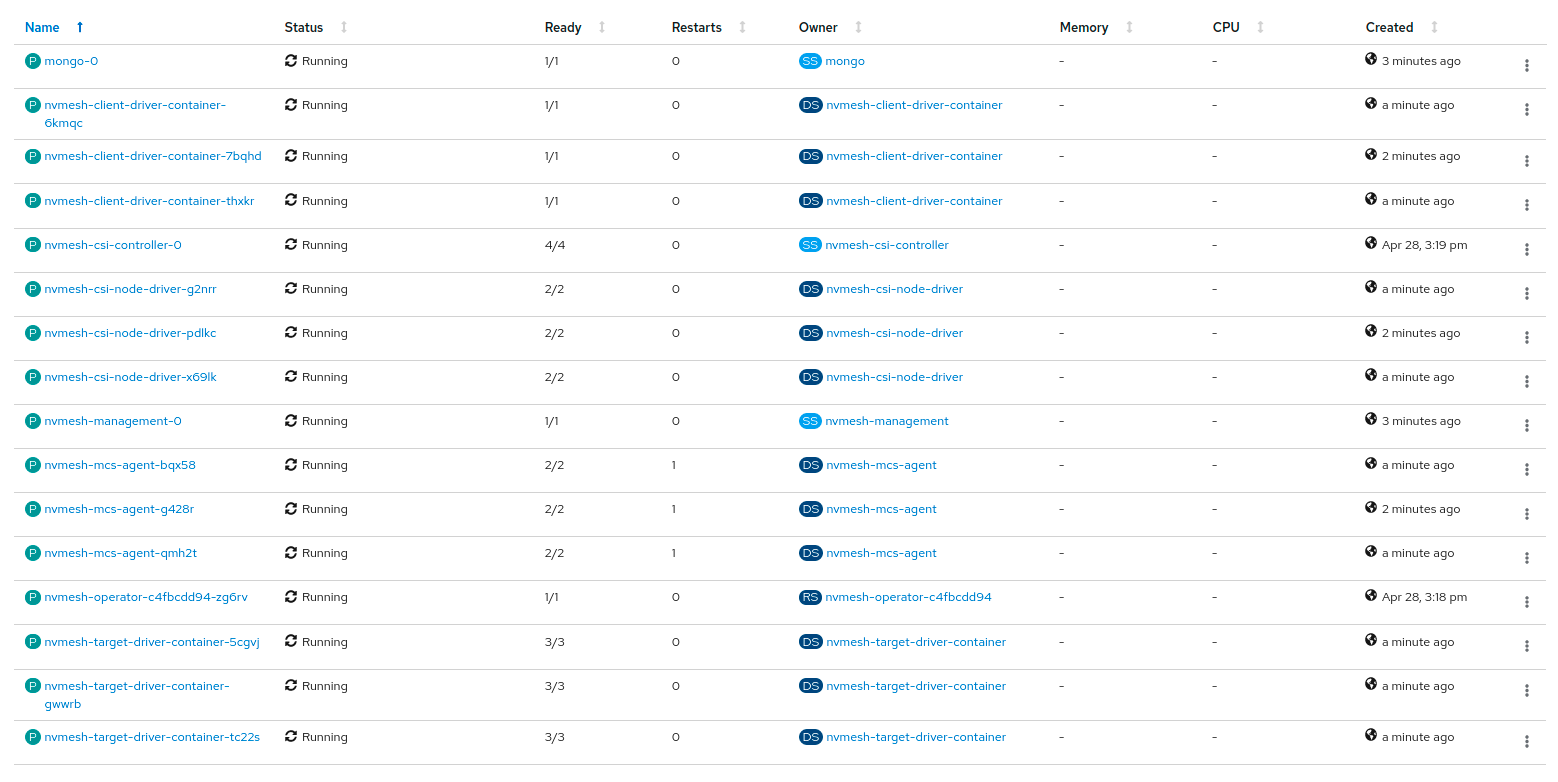
oc label node <worker_name> nvmesh.excelero.com/nvmesh-client="" && oc label node <worker_name> nvmesh.excelero.com/nvmesh-target="" - Go to the Pods page and validate that the Client, Target, and Management pods are up.
Post your comment on this topic.