NVMesh Deployment Process

1. Navigate to the Cloud Portal login page at portal.excelero.com
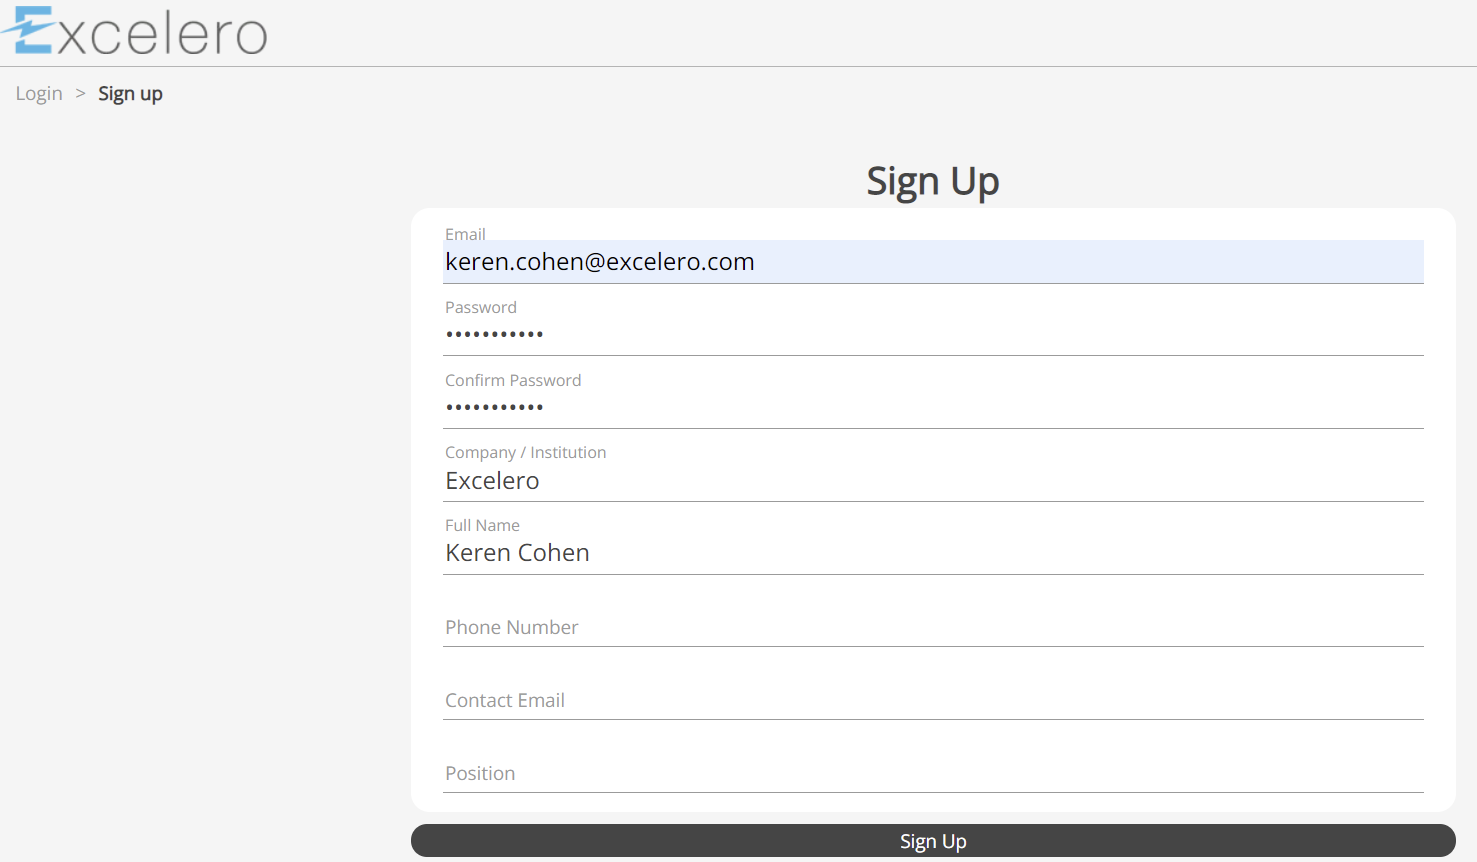
2. Using the Cloud Portal for the first time? Click on Sign up
- Insert your details and click the Sign Up button
- If you already have an account, you will get an error message: Cannot create new user, user already exists: XXXXX@XXXXXX
Go back to the Login screen
3. Login
Insert your email and password. Click on the Login button
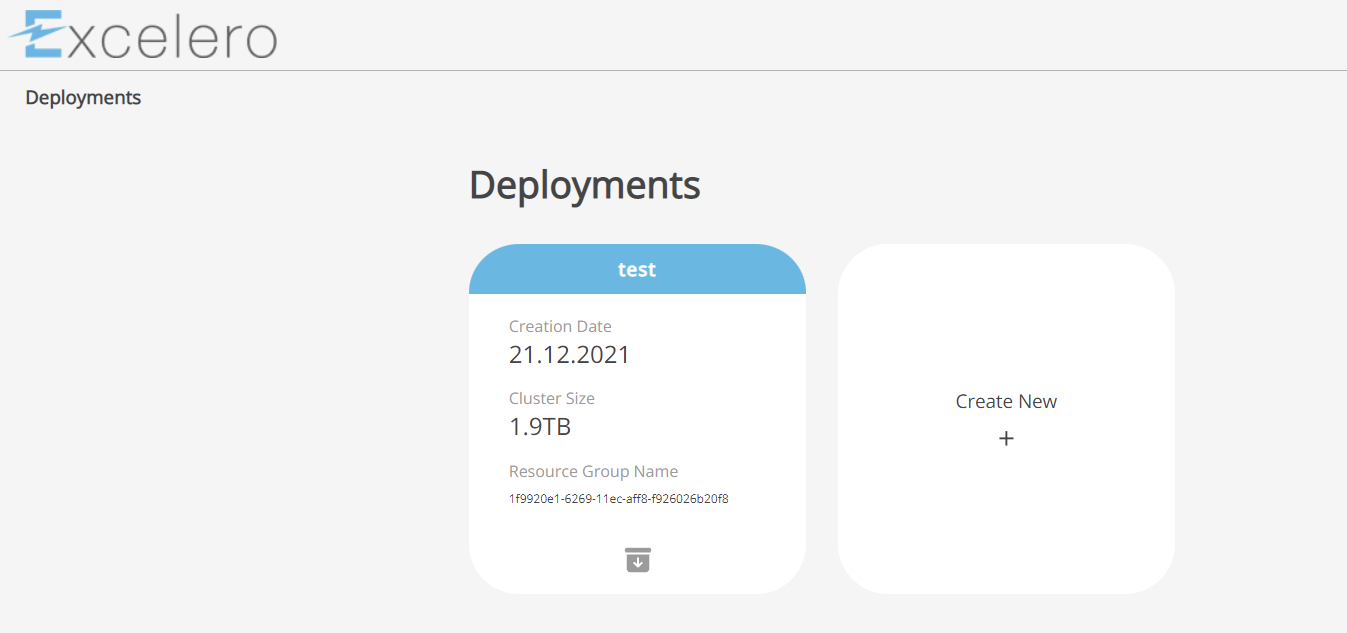
4. Deployments
The deployments page is where you create your new NVMesh storage cluster deployments and where you see all previously deployed clusters.
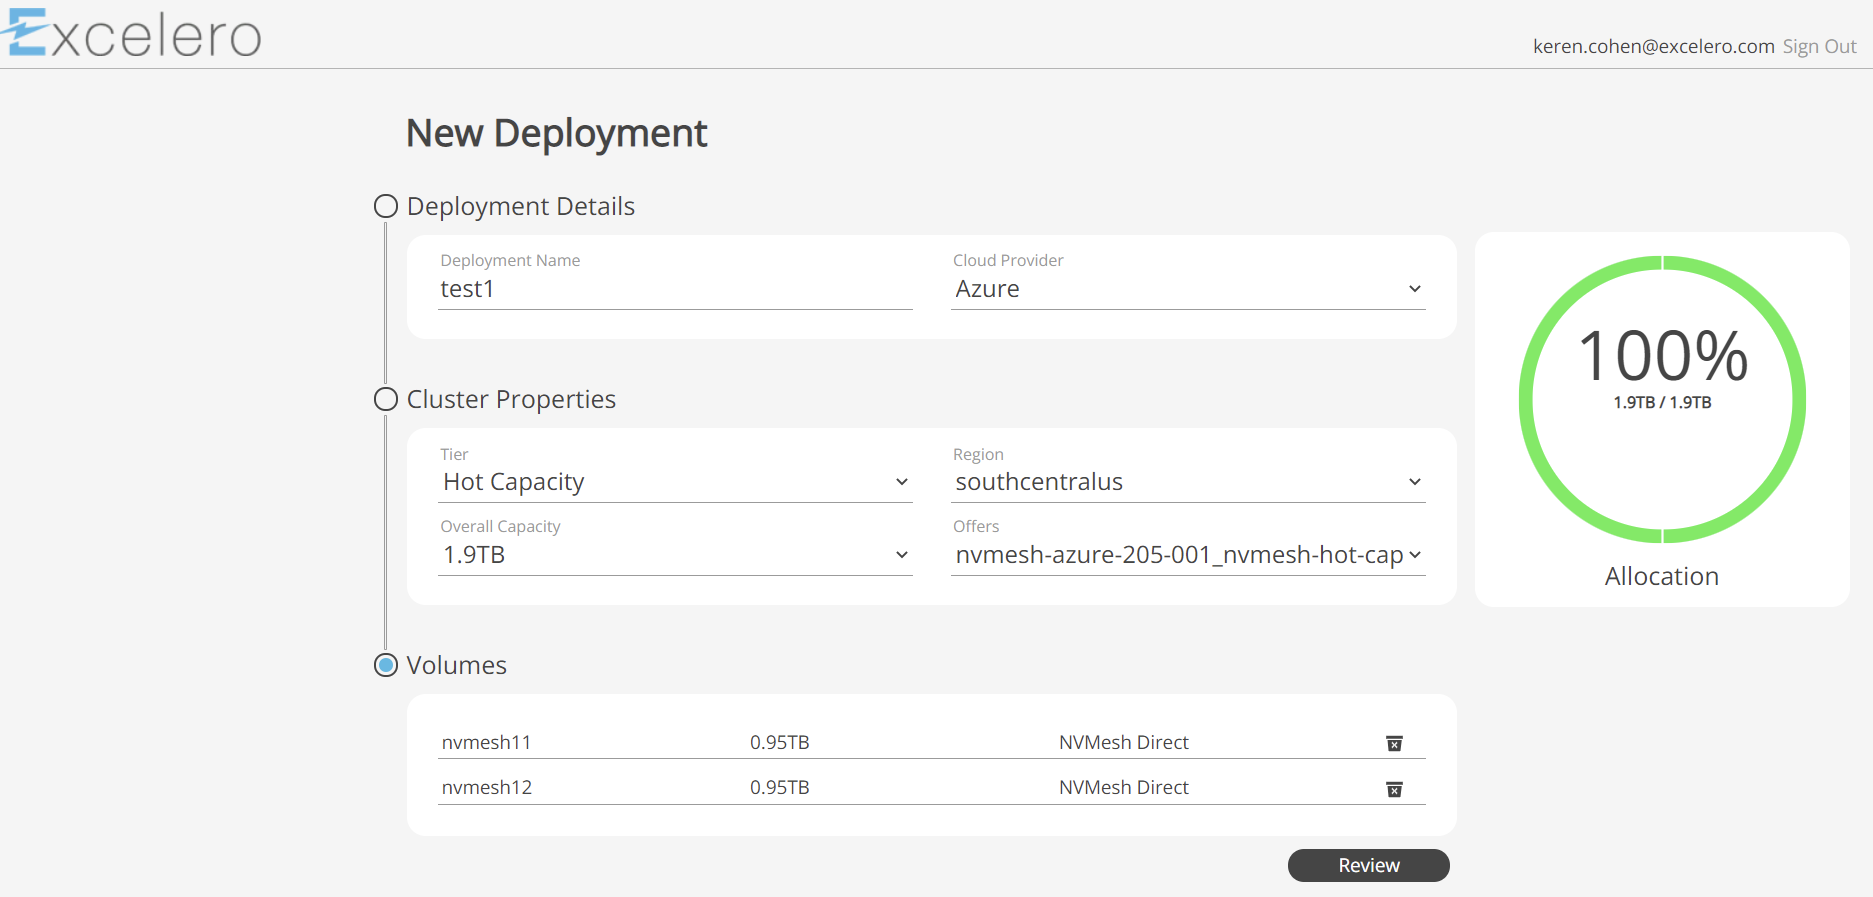
5. New Deployment
- Deployment Details: Enter a name for the new deployment and choose the cloud provider where it will be deployed
- Cluster Properties:
- Choose the storage tier to determine the infrastructure NVMesh is deployed upon:
- Hot Capacity Tier – Create storage clusters based on TCP/IP networking and Azure LSV2 virtual machines that provide an excellent balance between cost, performance and capacity.
- Extra Hot Tier – Create storage clusters based on Infiniband networking and Azure HBV3 virtual machines that provide the highest performance storage.
- Region – choose the preferred region for the deployment. The region options are based on the regional availability of the virtual machines where NVMesh software is deployed.
- Overall capacity – Choose the capacity needed from the available pre-configured sizes. The capacities are based on available drives in each tier.
- Offers – Choose the relevant offer for your deployment. The offer is the operating system and NVMesh software version for the client environment needed. This also is the same offer that appears in Excelero’s Azure marketplace offering (Typically there is one offer per tier)
- Choose the storage tier to determine the infrastructure NVMesh is deployed upon:
- Volumes
- You can pre-create your volumes when creating the cluster at this time.
- By default, the Cloud Portal creates a single volume that takes the entire capacity of the new storage cluster. If you want a different volume setup, delete the default volume (by clicking on the trash can on the right side) and define new volumes instead
- For new volumes, you must define per volume:
- Name (unique)
- Capacity – volume capacity, need to define with units, for example 5TB
- Connectiion type – defines the way the volume will be accessed by the client VM
- Once done – click on the (+) sign to the right and the volume will be updated
- Allocation chart – As volumes are created, the allocation chart on the right shows the allocated versus provisioned capacity. Pay attention to this as volumes are created to determine the proper overall size of the storage needed.
- Once complete – click on the Review button
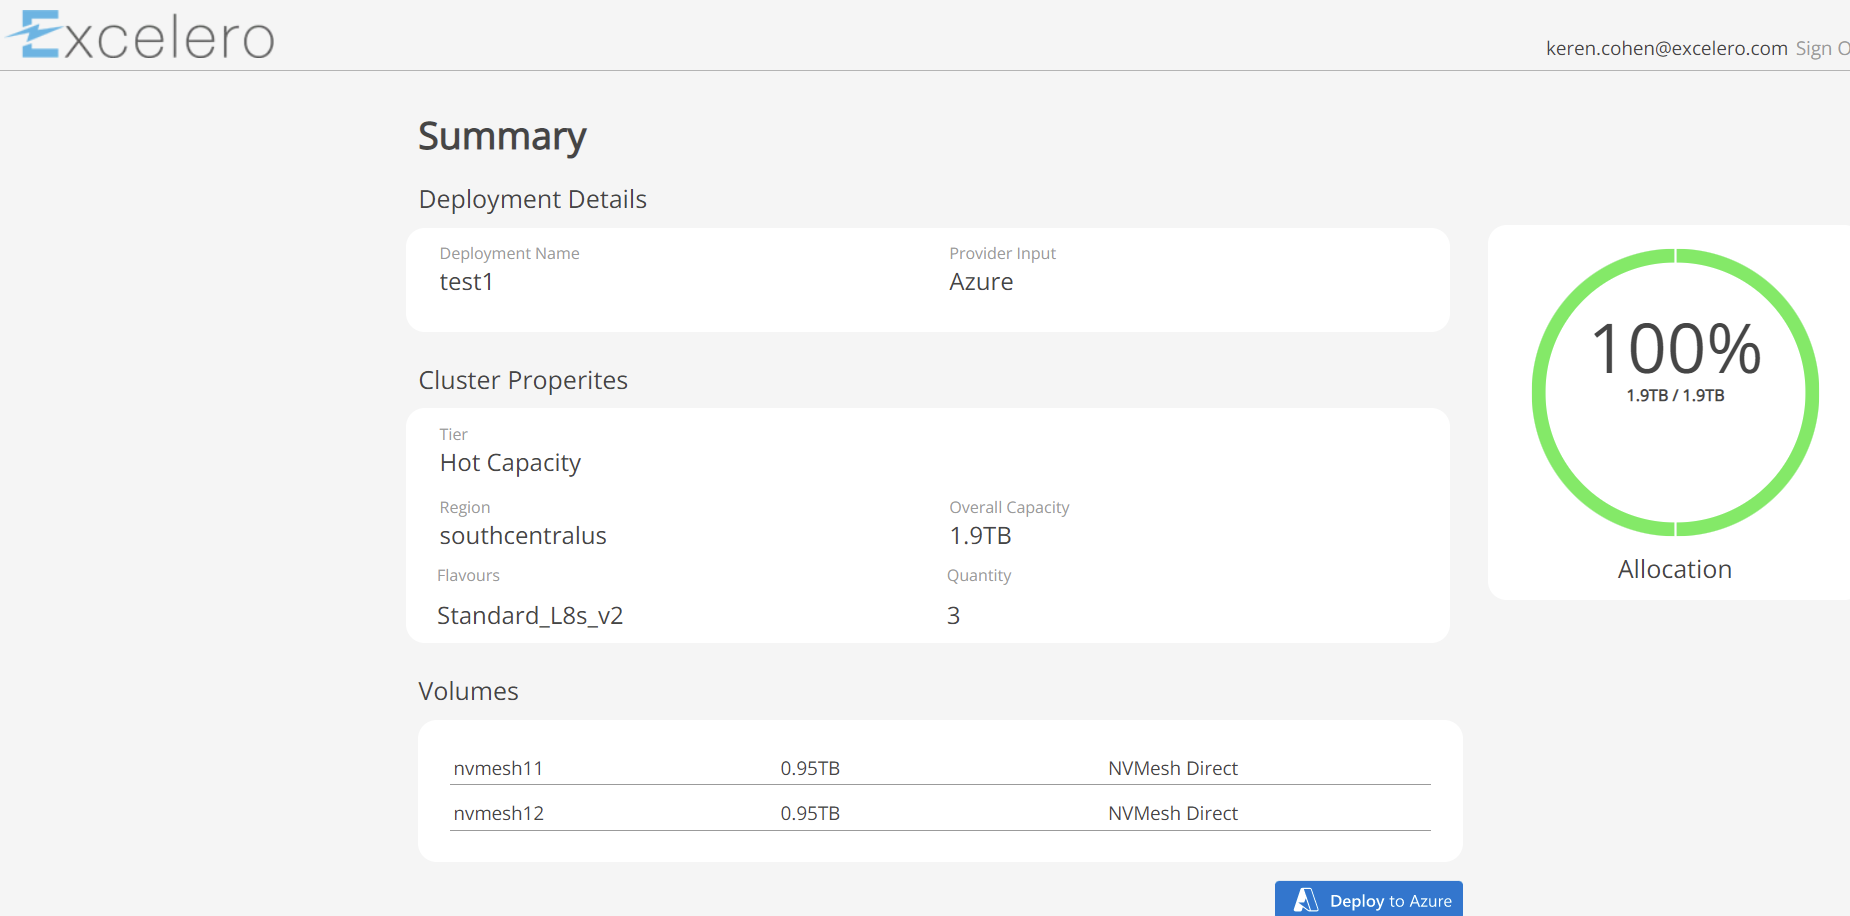
6. Summary form
- The summary form will show you all the information consolidated from the new deployment screen
- The Summary screen also provides additional details that include the virtual machine types and quantities used to create the requested storage cluster
- Once the environment is reviewed, click on the Deploy to Azure button to start the storage cluster deployment. Note a typical deployment will take 15 minutes or longer to complete.
7. The Deploy to Azure button will transition you to Microsoft Azure Custom Deployment tool.
For any help you can use Azure documentation at https://docs.microsoft.com/en-us/azure/?product=featured&WT.mc_id=Portal-Microsoft_Azure_Support&product=all